Get Elm up and running
I’m infatuated with Elm right now. A functional programming (FP) language to make HTML frontend development easier. Read about Elm’s virtues at the official Elm homepage: elm-lang.org. In this article I don’t want to introduce you to the language. When you come back I’d rather like to show you a way to get Elm up and running on your computer without polluting your system with yet another framework 😉 Then you can do your own, local experiments.
Install Docker
The cornerstone for keeping your system clean from „framework pollution“ to me currently is Docker. With Docker you can set up any number of „virtual systems“ on your computer in a very lightweight manner. Don’t roll your eyes and think „Oh, no, not again all the hassle of setting up a virtual machine…“ Because Docker is not about virtual machines (VM), but about containers, which are like VMs but, well, easier to setup, manage etc.
It took me quite some time to jump on the Docker bandwaggon. But after a short personal training by Tim Klug (from Hamburg’s .NET developer community) now I’m on it and it feels great. Already after just a few days with Docker on my Mac I can hardly imagine having ever done software development without it. It’s a godsend! Trust me

So before installing Elm switch over to Docker and install it on your machine be it a Windows, OSX or Linux computer. There are convenient installers available. It should be a no-brainer. Took me like a minute or so.
Once you’re done with the installation quickly check if docker is running before you continue. Open a terminal window and execute this command
docker --version
If all’s well Docker will print its version number. If not, well, maybe you just have to explicitly start Docker first. Check your Mac launchpad or the Windows program menu.
Create your own Elm Docker image
To keep your host system free from framework pollution don’t download Elm to it, don’t install Elm on it. Instead run Elm only within the confines of a Docker container. Set up a virtual system just for Elm. To that end create a Docker container image with all that’s needed.
An image is like a template for containers. When you run an application inside a container you instanciate the container from an image. Sounds like object-orientation for IT admin, doesn’t it? 😉
Since you want to experiment with Elm and possibly want to run several Elm applications over time it’s handy to have a specific Elm Docker container image. It will be a pretty bare bones virtual Linux system with node.js, Elm, and Nginx. This, then, you can instanciate many times and each time fill the resulting container with another application.
Sound’s difficult? But it’s not. You’ll see. Let’s get going:
- First create a directory for your Elm exploration on your local drive, i.e. the host system, call it elmdemo.
- In that directory store a file named Dockerfile with the following content:
FROM debian:latest

# prepare
RUN apt-get -y update
RUN apt-get -y install apt-utils

# install curl
RUN apt-get -y install curl

# node + npm
RUN curl -sL https://deb.nodesource.com/setup_4.x | bash
RUN apt-get install -y nodejs

# elm
RUN npm install -g elm
RUN npm install -g elm-test

# nginx
RUN apt-get install -y nginx

# make elm reactor and nginx accessible
EXPOSE 8000 80
The Dockerfile is like a Windows .bat file or a Mac bash script. Mainly it contains commands to be executed on the commandline within a container.
Build image
Now open a terminal window and change the working directory to the elmdemo directory.
On the command line execute
docker build . -t elm
to build your own Docker container image.
Docker will load the Dockerfile from the directory and interpret it. That means it will first download a prebuild base image from its own repository in the cloud. That will be a very stripped down version of a Debian Linux (see FROM clause in Dockerfile). Once this image has been downloaded Docker will run within that image all the commands tagged with the RUN keyword.
This will take a little while and produce considerable output in the terminal window. But sit tight… it all will end well
Check image
In the end you can check the success of this operation by listing the docker images on your computer:
docker images
The output should look something like this:
REPOSITORY   TAG      IMAGE ID       CREATED        SIZE
elm          latest   18ff64885a9e   1 minute ago   334.7 MB
And if you still can’t believe what just happened, actually instanciate this image:
Hereafter-2:elmdemo ralfw$ docker run -it elm
root@943c1a41ef21:/#
You’re now inside the container in its root directory logged in as the root/admin user.
Check if Elm has been installed (and I don’t have the slightest doubt about that) by running
elm --version
Elm will respond by printing its version number and all’s ready for your first experiment.
But first type exit at the command prompt. You’ll return to your host system’s command prompt.
Clean up
You can move on to the next section now – or you can clean up a little. Because your container is still there. It’s like an empty soda can still sitting on Docker’s desk 😉 Why not toss it in the trash? Here’s how you garbage collect containers no longer used:
Hereafter-2:elmdemo ralfw$ docker ps -a
CONTAINER ID   IMAGE   COMMAND      CREATED         STATUS                     ...
943c1a41ef21   elm     "/bin/bash"  2 minutes ago   Exited (0) 3 seconds ago   ...                     silly_elion
Hereafter-2:elmdemo ralfw$ docker rm 943
943
Hereafter-2:elmdemo ralfw$
First list all containers with docker ps -a. Then remove your container with docker rm by specifying the first couple of letters of its ID (e.g. 943).
You don’t need to do that. There is a way to restart a stopped container. But that’s beyond the scope of this article.
TL;DR
In case you do not want to go through all the trouble of generating you own Elm image you can download one I've set up with the above Dockerfile and made public. Download it from Docker using this command:
docker pull ralfw/elm
Please note: If you want to take this shortcut then you have to replace the image name "elm" in the following examples with "ralfw/elm".
Ready for your first Elm language experiment
Now you’re all set for your first Elm application. It’s just a hello-world example, but still… 😉 It will run within a Docker container, but you’ll be able to edit it with your favorite text editor/IDE and use it through your host system browser.
Start with a simple text file called main.elm you create in the elmdemo directory. The content of the file is this short elm code:
import Html exposing (text)

main =
  text "Hello, World!"
The main identifier is Elm’s entry point into an application and in this case is assigned to a function which just returns the message to be displayed in your browser when opening the corresponding page. Elm will do all the magic in the background of calling the function within the context of a HTML page and rendering the function result.
Store the file and then create a container from your freshly built Elm image like this. Be sure to run the terminal in your elmdemo directory:
docker run -it -p 8000:8000 -v $(pwd):/tmp/elmdemo elm
You saw the docker run -it command before. It’s starting a new instance of your image and places you within it.
In addition to that, though, now it also makes the contents of your elmdemo directory available within the container. You find it in the intra-container directory /tmp/elmdemo, a so called Docker volume.
Also it maps the exposed port 8000 (see EXPOSE in Dockerfile) to your host systems port 8000. An exposed port is like a hole drilled through the container’s wall. Through this hole you can talk to applications inside it. But since such a port might already be in use on a host system you can re-route it to some other port.
Now you can run your first Elm application inside the container. The terminal window's command line should have switched to the root of the container again.
Run Elm's web server
Go to the volume directory and then, once you start Elm’s own web server,…
cd /tmp/elmdemo
elm reactor
elm reactor -a 0.0.0.0
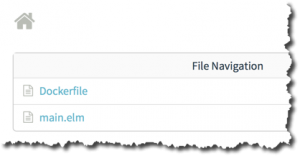
What you see when you are able to connec to Elm’s web server is the file and directory tree of the folder it got started in. That way you can easily switch between parts of your application. It’s a web server for developers.
Now click on main.elm to start your first Elm application!
However, what you’ll see is not yet the expected greeting, but this:
The web server first has to build your application. It get’s translated from Elm to JavaScript and some Elm libraries need to be downloaded into your bare bones application directory.
This only takes a few seconds, though. And then, finally, there it is:
Yay! Celebration!
A roundtrip
Now change your program code in the editor on your host system. Let the message be „Hello, World! v2“.
Save the changed main.elm file.
Refresh the application page in your browser.
Elm’s web server will again take a second to recompile the file and then display the new message.
Done!
If you like to try out more examples with your newly set up Elm infrastructure, check out the examples page in the Elm documentation. Clip the Elm code from the online editor page and paste it into your main.elm file. Then do as above: save, refresh page.
Voilá! That’s how your local „deployment cycle“ could look like.
Hosting Elm in a real web server
So far your Elm application was run in the Elm web server. But does it also work with regular web servers like Nginx? Here’s the proof:
Stop the reactor web server in your container, exit the container, then start up a new container from your Elm image with this command:
docker run -it -p 80:80 -v $(pwd):/tmp/elmdemo elm
Again, you're making your development directory available inside the container. But this time you're wiring port 80 to the outside world. That's the port Nginx makes web pages available at.
At the command prompt of your Docker container then do this:
cd /tmp/elmdemo
elm make main.elm --output index.html
You switch to the application directory and actually compile your Elm code into HTML/JavaScript. elm make creates a static HTML file which can be accessed through any web server. You can even double-click it on your host system and view it right in your browser without any web server in between.
Next make the file available via Nginx:
cp index.html /var/www/html
nginx
This copies the compiled Elm code into Nginx' default website directory and starts the web server. (Don't worry that you don't see any response from Nginx. It's running just fine in the background.)
If you now open your web browser and point it to http://localhost:80 you'll be presented with the page generated by the Elm application served by Nginx.
***
Phew... That's it. You're done. Elm is up and running on your computer – without polluting it ;-)
Now it's up to you to play around with it. Try it out like shown here with much of the comfort of your favorite development environment (see here for how to configure your editor) – or use the online IDE for some quick results.
Enjoy!